Run a Windows Application in the Cloud
Core offers a wide variety of virtual workstations and a low-latency streaming protocol for easy remote access.
Create
Choose an OS
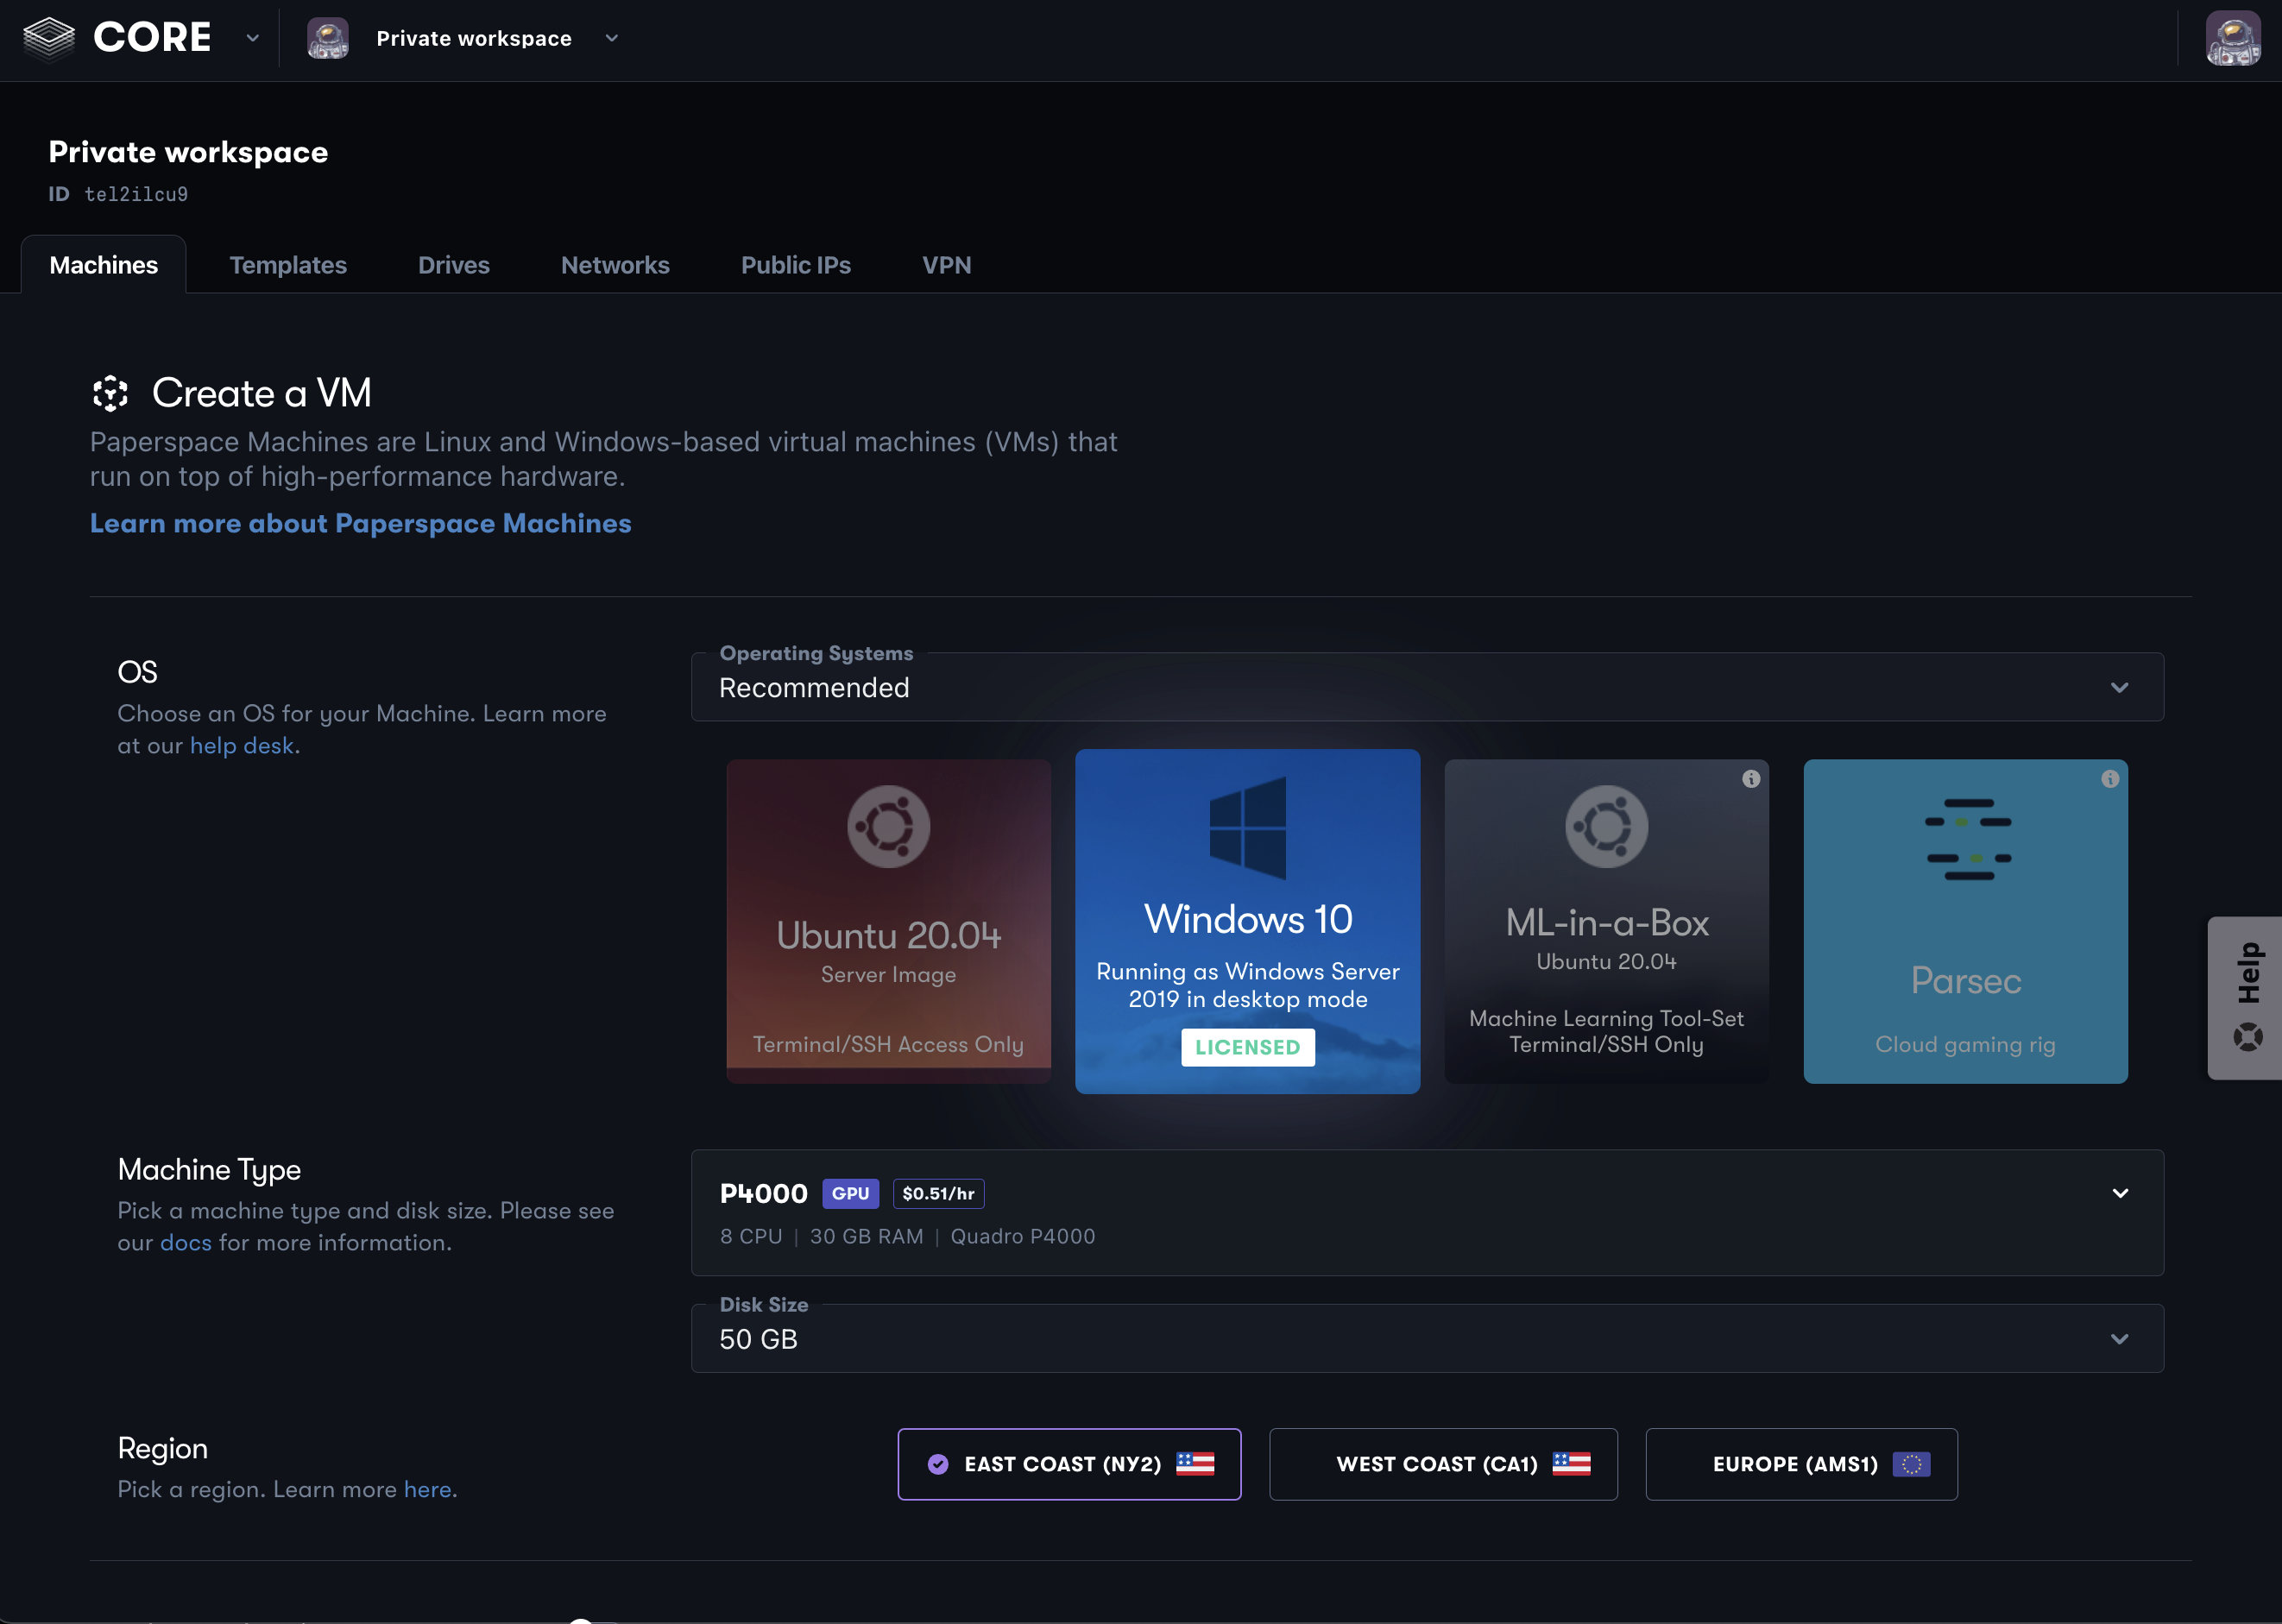
Start by heading to the Core create machine page. As a first step, you'll select a Windows OS. The Windows 10 licensed edition is the most popular. This template is technically a Server edition of Windows but looks and feels just like a regular desktop operating system. Core also offers an unlicensed version of Windows 10 (referred to as BYOL) which requires you bring your own Windows license.
In this example, we'll use the standard Windows 10 licensed edition. Here is an image of the create page with this template selected:
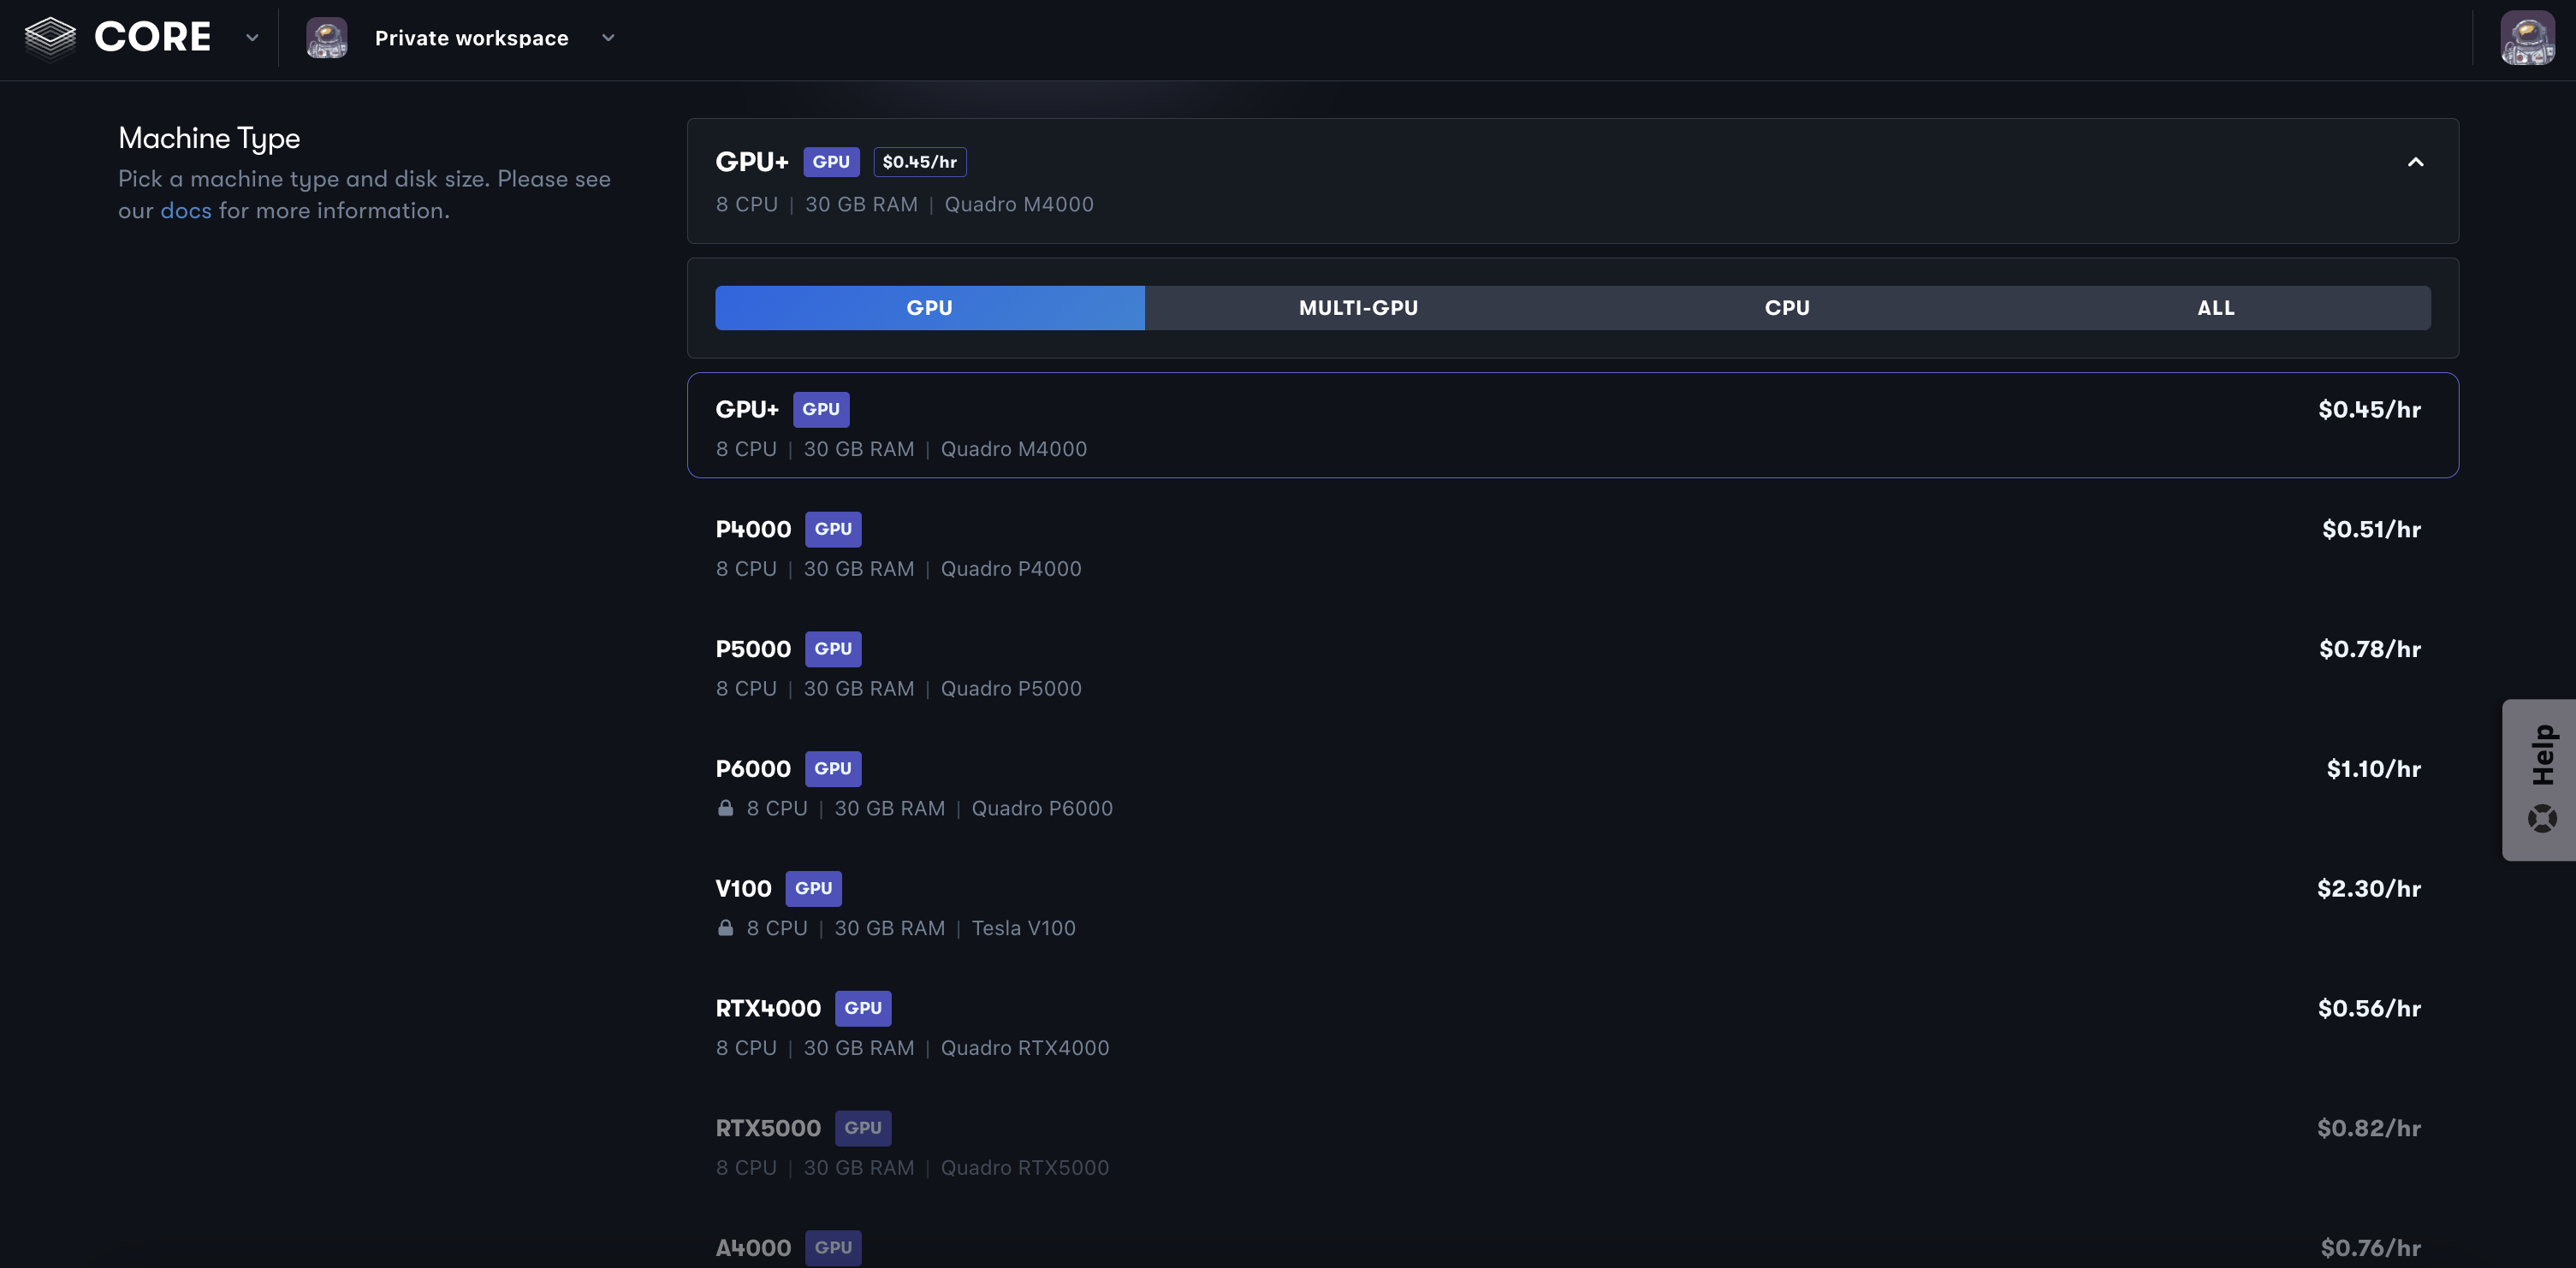
Choose a Machine Type
Core specializes GPU-enabled applications. As a result, the GPU machine types, which include a dedicated NVIDIA GPU, are the most popular options on Core and the default option when creating a machine. Other options include CPU types and vGPU types. These are not designed for compute or graphics-intensive applications and are most commonly used for use-cases like hosting a web server, licensing server, etc. In this example, we'll select a P4000.
Choose a Region
There are three Core datacenter regions. You should select the region closest to you to decrease latency. You can learn more about regions here and you can test your latency by following this guide.
Advanced Options
An option that you may want to configure is auto-shutdown which will stop your machine after becoming idle for a pre-defined amount of time.
You may also want to invite other users to access this machine. You can learn more about managing accessors here.
You can view the full list of advanced options here.
Create!
From there, you may need to add your payment details if this is your first time creating a machine. Otherwise, just click create.
Windows machines can take a few minutes to provision the first time — subsequent starts will take less time. You'll see the machine transition from provisioning, to starting up, to ready.
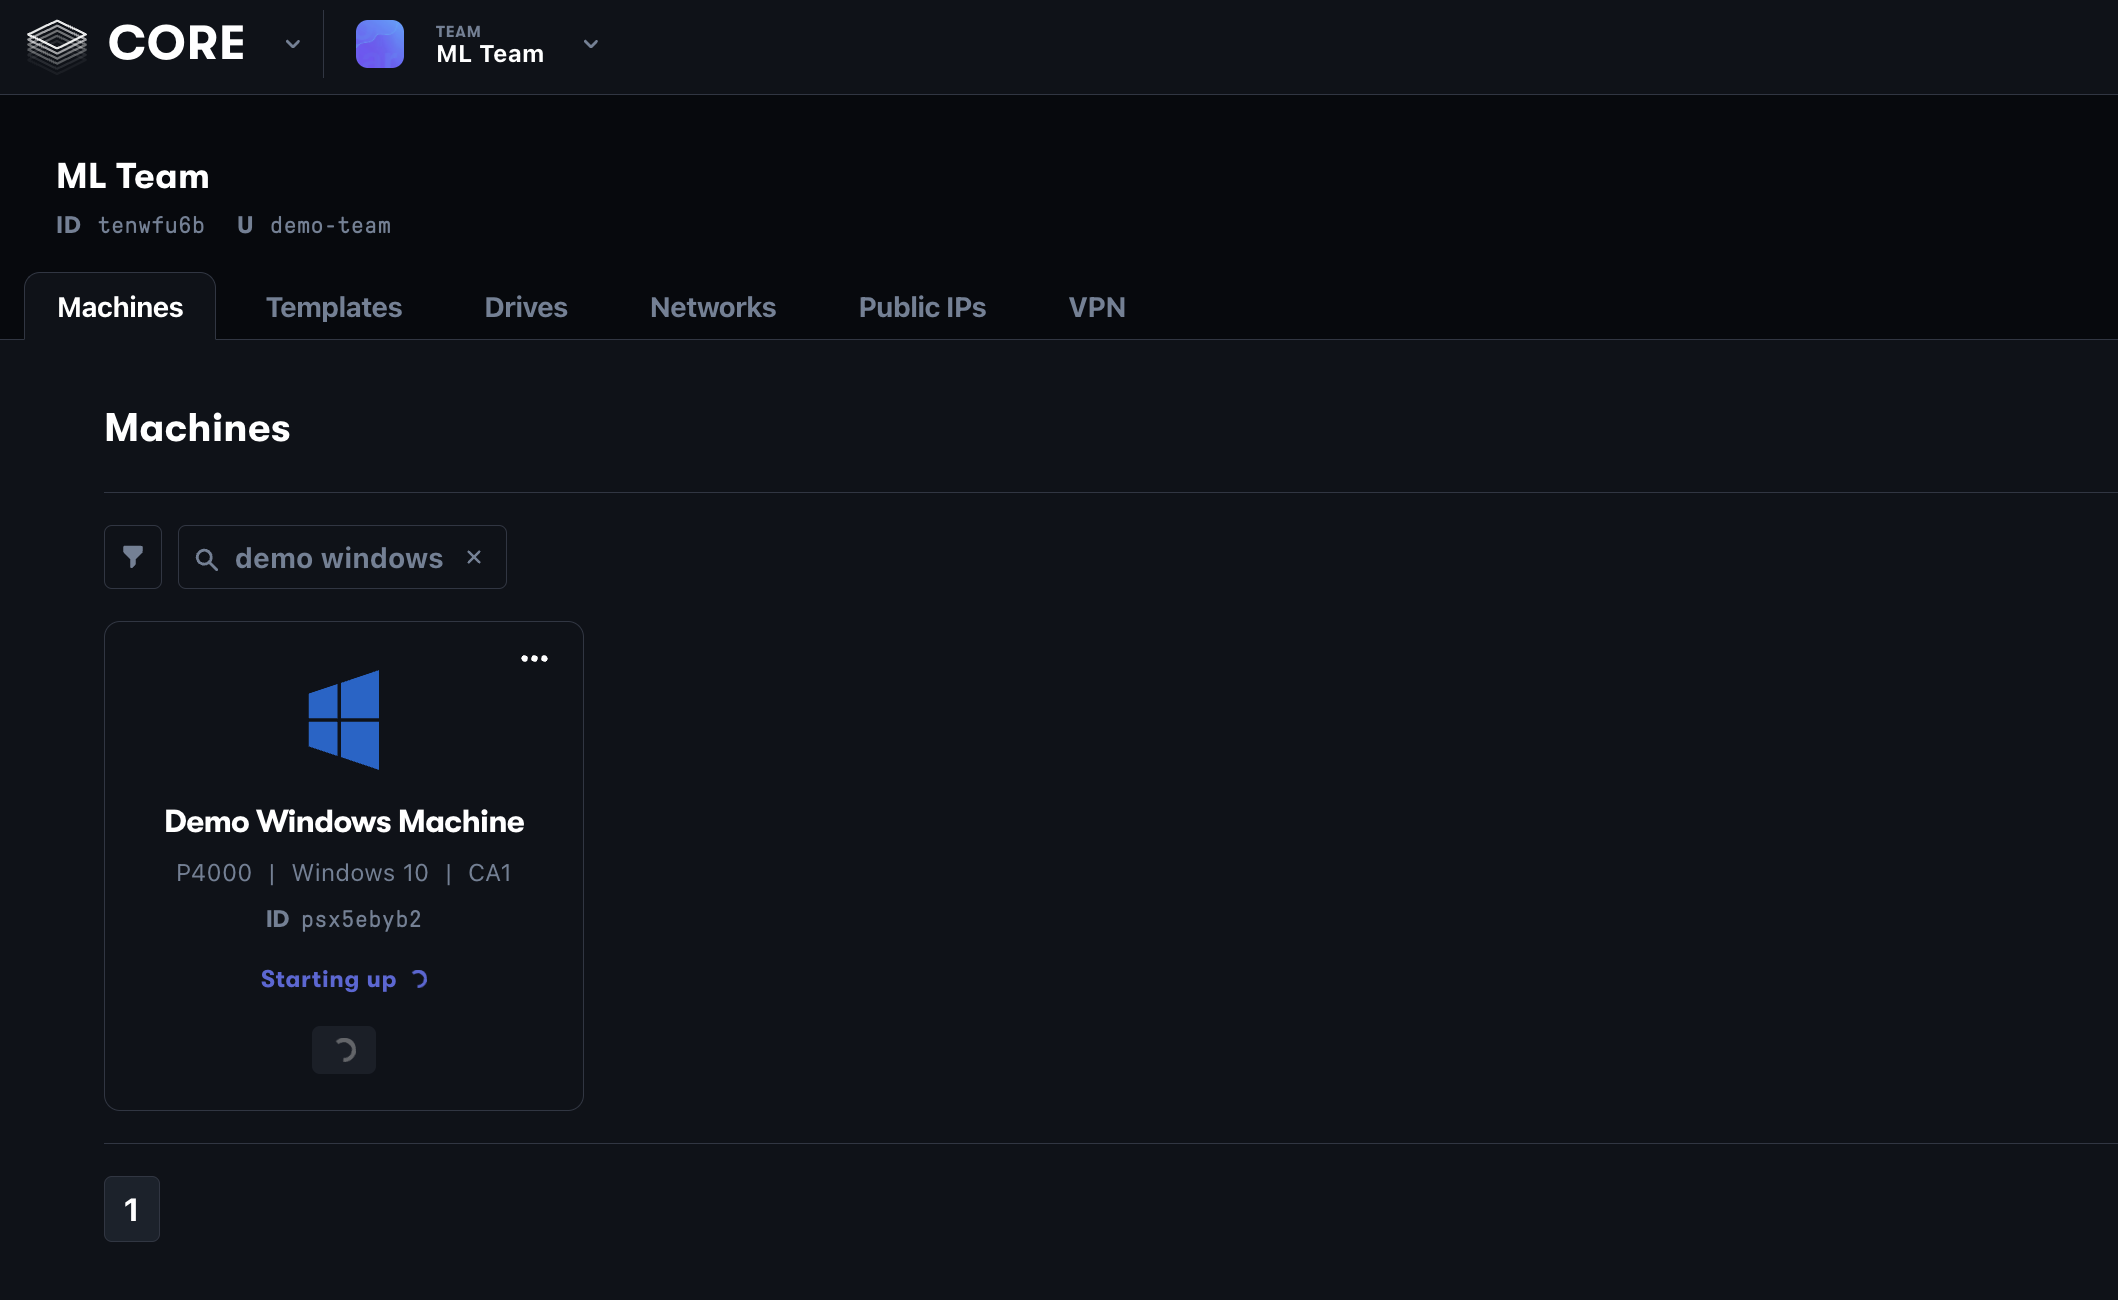
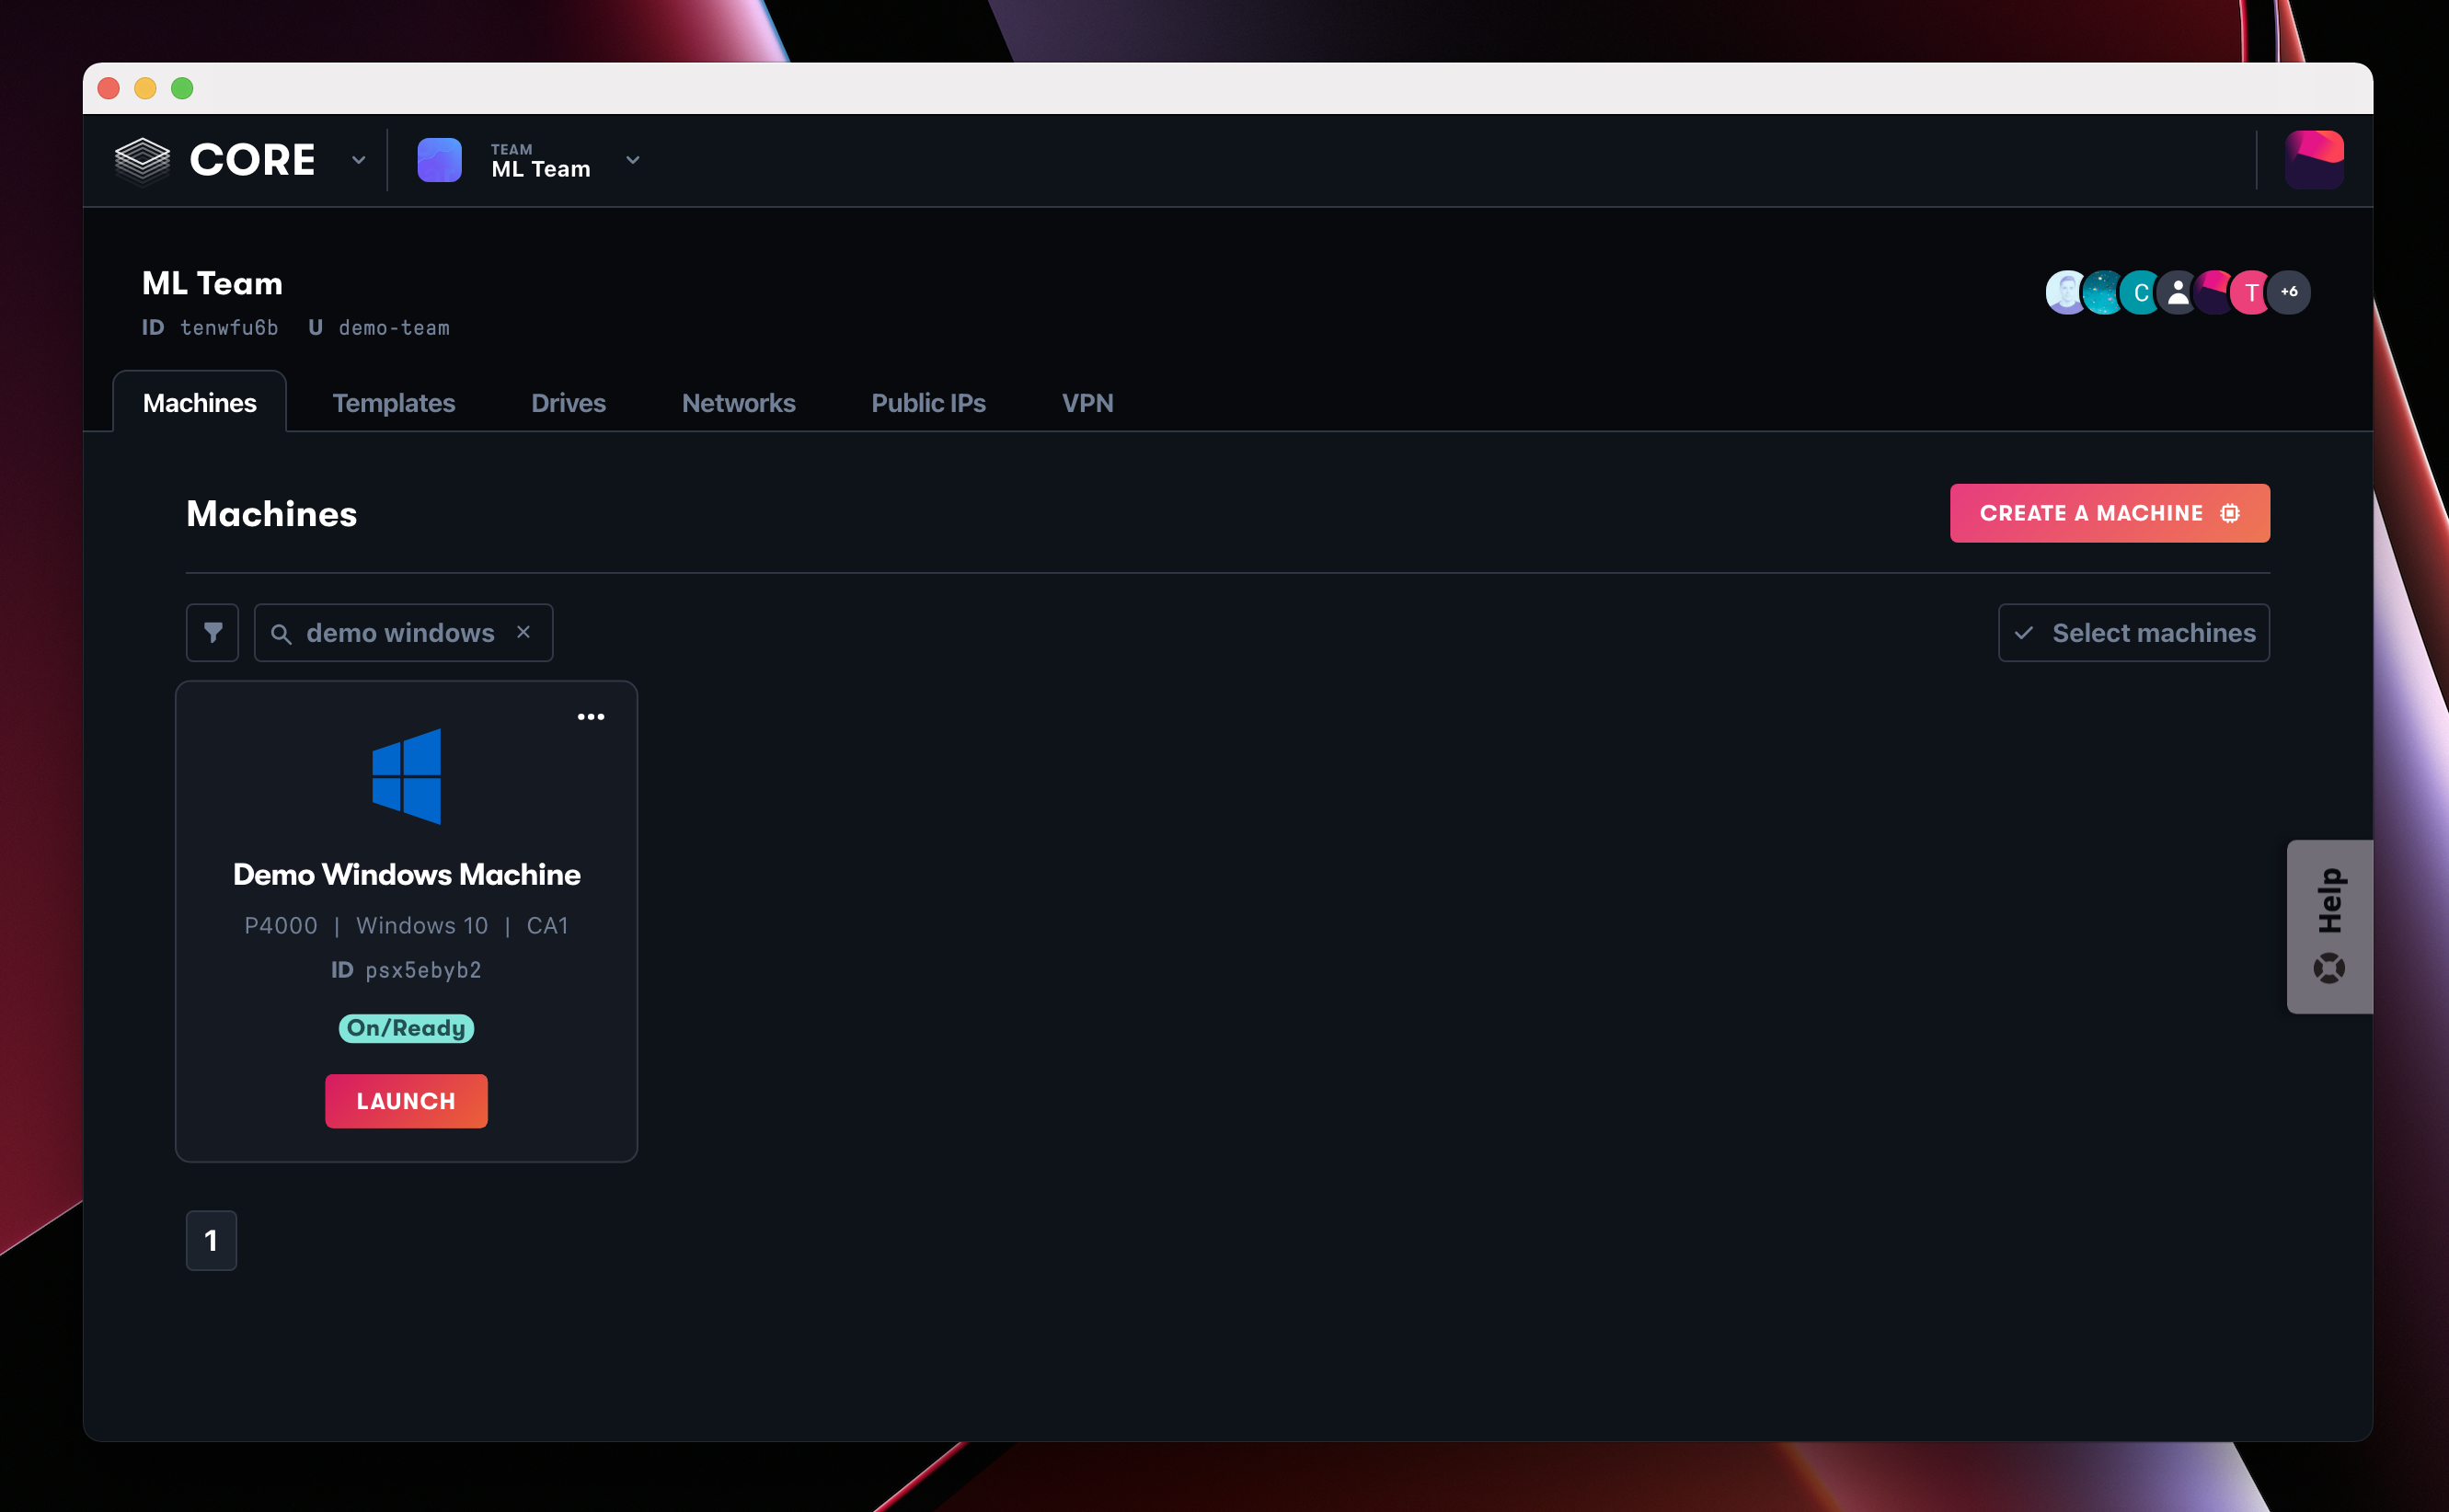
Once your machine is in the on / ready state, you are ready to connect.
Connect
There are a few different options for connecting to your Core machine:
- Paperspace: desktop app or connect directly from a web browser
- Third-party tools:: You can also use standard remote desktop tools such as RDP, TeamViewer, VNC, etc.
In this tutorial, we will use the desktop app offered by Paperspace. The app offers the best streaming performance, better clipboard syncing, etc.
Once you have the app downloaded and installed, you can connect to your remote machine. From the console, you can hover over the machine and click the launch button to connect. Note: You can also connect from the machine details page.
Run Your Applications
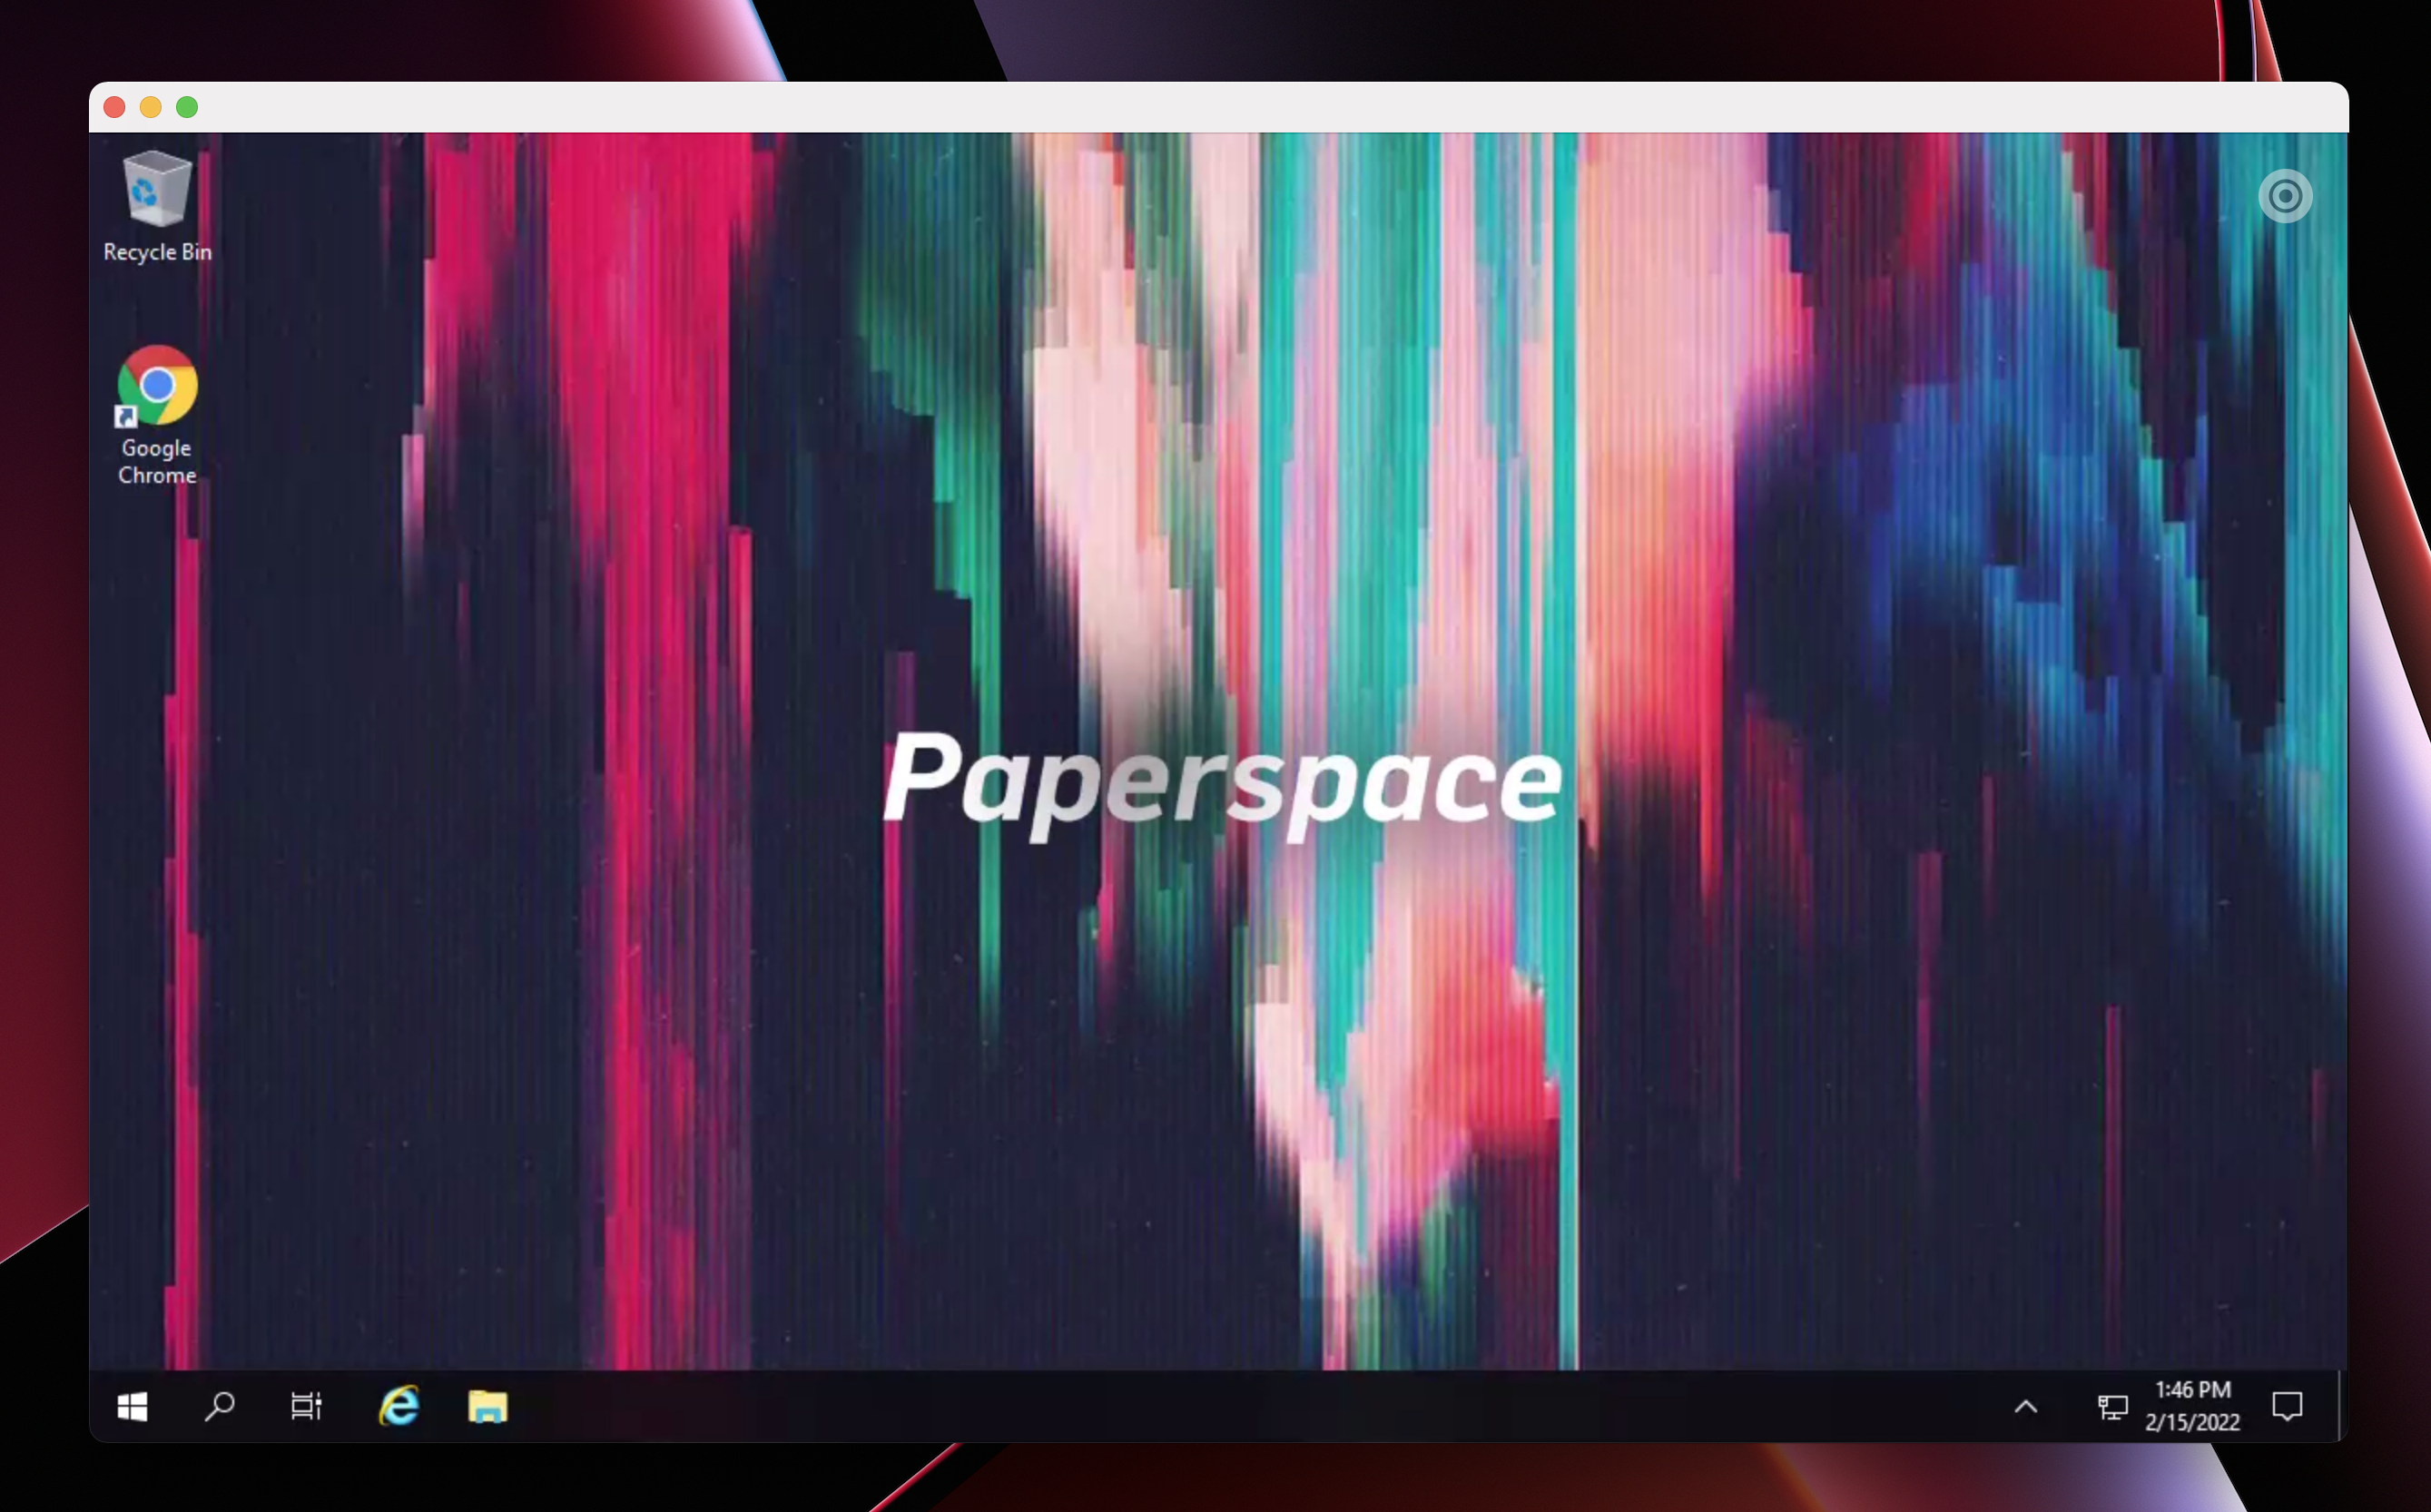
When you first access your machine, you'll find the Chrome web browser pre-installed. From here, you can download any application like you normally would on a local laptop or desktop computer. Note: You have full root access on the Windows OS.
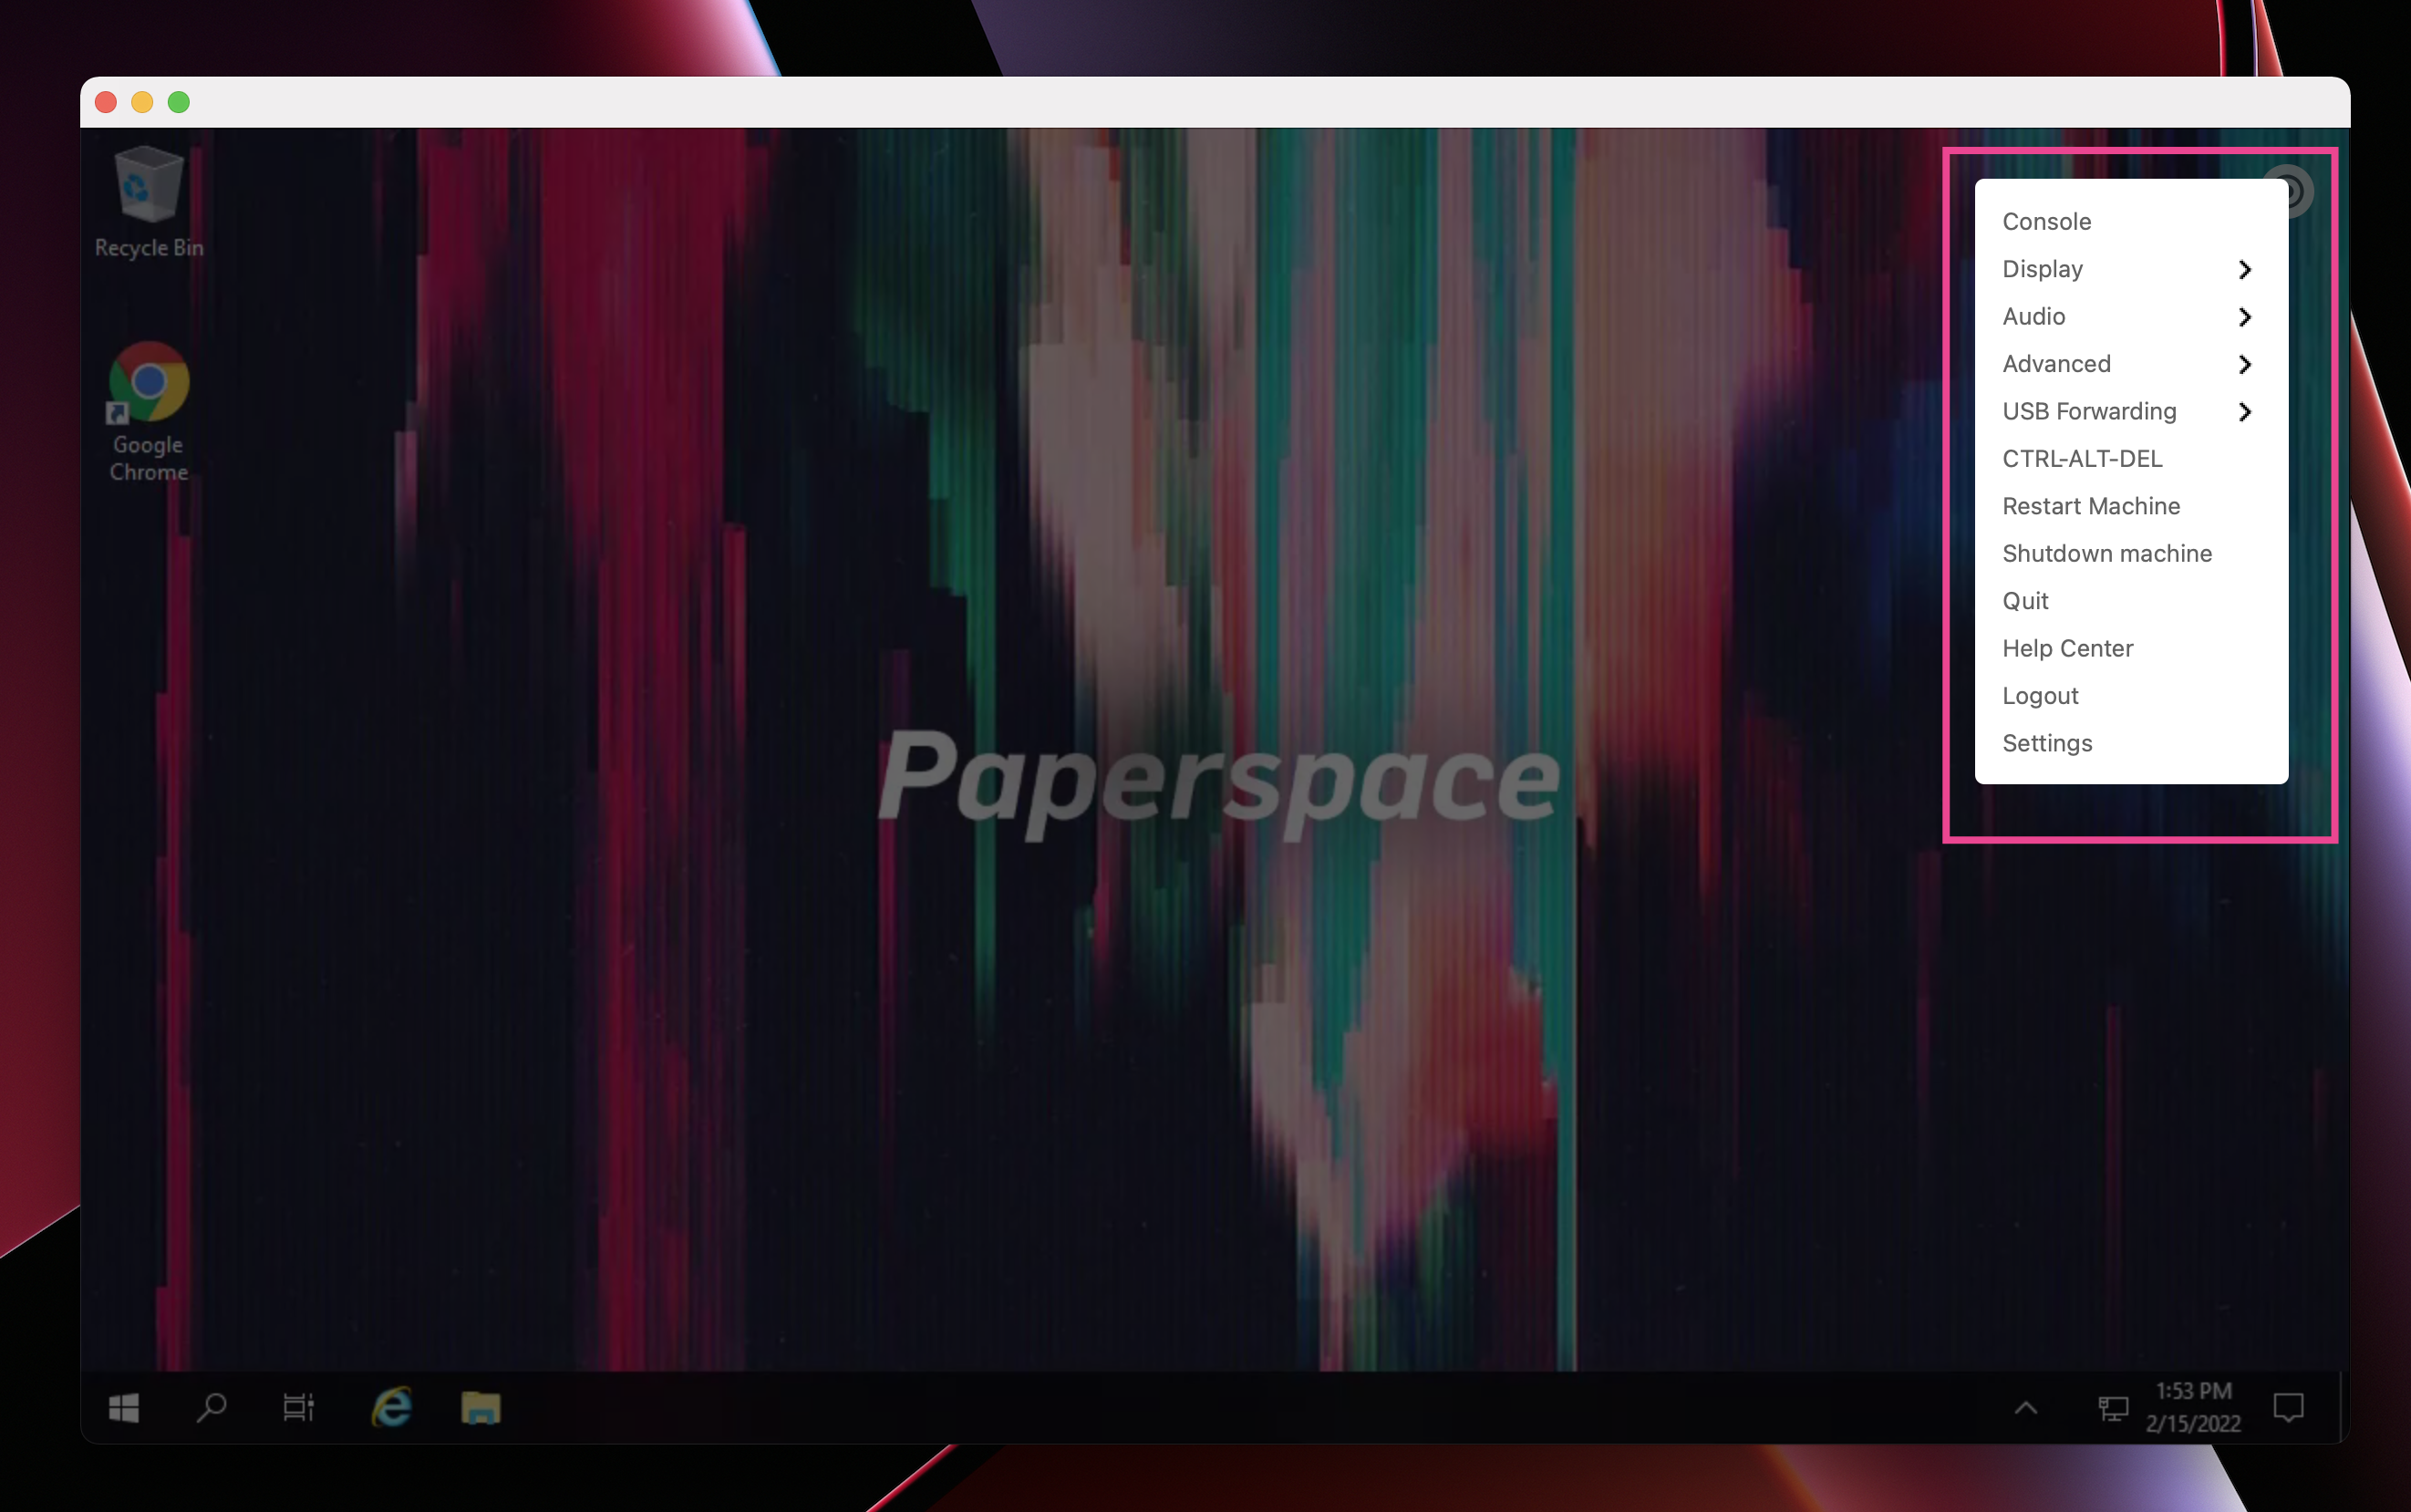
App Menu
Be sure to check out the onscreen menu which includes options for fullscreen, multi-monitor, etc. In addition to the console, you can also use this menu to stop or restart the machine.