Basic operations
This guide explains how to create and run new Gradient Workflows.
Workflows are in beta, so try them out and let us know what you think. Hold off on using them for production use cases, as we can't promise bug fixes or new features just yet.
Overview
The fastest way to become acquainted with Gradient Workflows is to run the sample workflow described in the Gradient Workflows Tutorial.

After running through the tutorial, this guide will provide additional details on how to create and manage new workflows.
How to create a workflow in the Gradient console
A new workflow may be created via the Gradient console or via the Gradient CLI. The simplest way to create a new workflow is to use the templates available in the console.
The first step is to create a new project in Gradient or select an existing project.
Next, navigate to the Workflows tab and choose one of the starter tiles in the Select a template section.
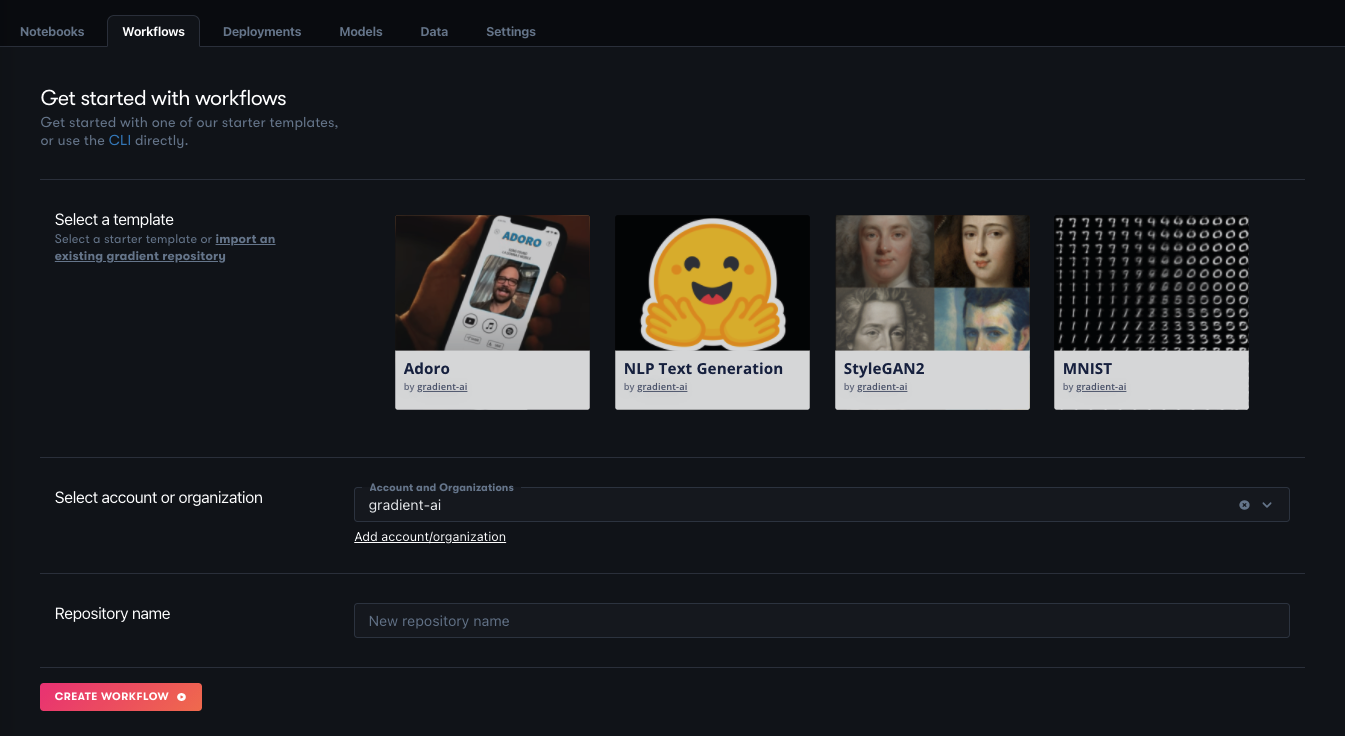
In the Select account or organization section, we will be connecting this workflow to GitHub. The GitHub connection is required to run a workflow because it allows Gradient to trigger workflow runs when new code is pushed to the repository, thus providing the basis for CI/CD.
All that remains is to give the workflow a name in the Repository name section, and that's it. Go ahead and select Create workflow to get up and running.
How to create a workflow in the CLI
It is also possible to create a workflow using the Gradient CLI.
The first step is to make sure the CLI is up to date by running the following command:
pip install -U gradient
The next step is to create a project and grab your project ID. The project ID is available in the tile that contains the project in the Gradient console. You can create a project that integrates with a Github repo or a create a standalone project. Use a GitHub project if you already have code you are working with in GitHub.
Now it's time to run a workflow using the CLI:
gradient workflows create --name <my-workflow-name> --projectId <project-id>
The command will return an ID for the workflow (for example) 7634c165-5034-4f49-95fa-005fc0e7970b and the new workflow should now be visible in the Gradient console.
How to import a workflow
To import an existing Gradient repository, head to the Gradient console, select the Workflows tab, and create a new workflow.
Next, select the text link that says Import an existing gradient repository and select an existing Gradient project from GitHub.
This will take you to the Let's create a Workflow screen, where you can follow its instructions to create one, or run an existing workflow.
How to write a workflow spec
Below is an example of a valid workflow.yaml spec. It clones the repository from https://github.com/NVlabs/stylegan2, generates images from the repo script run_generator.py, and outputs the results to the Gradient-managed dataset demo-dataset.
jobs:
  CloneRepo:
    resources:
      instance-type: C5
    outputs:
      repo:
        type: volume
    uses: git-checkout@v1
    with:
      url: https://github.com/NVlabs/stylegan2.git
  StyleGan2:
    resources:
      instance-type: P4000
    needs:
      - CloneRepo
    inputs:
      repo: CloneRepo.outputs.repo
    outputs:
      generatedFaces:
        type: dataset
        with:
          ref: demo-dataset
    uses: script@v1
    with:
      script: |-
        pip install scipy==1.3.3
        pip install requests==2.22.0
        pip install Pillow==6.2.1
        cp -R /inputs/repo /stylegan2
        cd /stylegan2
        python run_generator.py generate-images \
          --network=gdrive:networks/stylegan2-ffhq-config-f.pkl \
          --seeds=6600-6605 \
          --truncation-psi=0.5 \
          --result-dir=/outputs/generatedFaces
      image: tensorflow/tensorflow:1.14.0-gpu-py3
For more details on writing valid workflow YAML files, check out the Workflows spec reference guide.
How to create a dataset for workflows
Datasets referenced in the workflows spec need to be created before running the workflow for the first time. On subsequent runs of the workflow the dataset will be used again, but different Dataset versions will be created for each output Dataset.
For more information about Datasets see Versioned Data.
The above Workflow creates a new output Dataset version in the Dataset named demo-dataset. So before running this Workflow make sure a Dataset with that name already exists. You can run this command to list your Datasets: gradient datasets list.
If you completed the Workflows Tutorial you will already be accustomed to creating datasets. If not, you can also brush up on datasets by visiting how to create a dataset and dataset version in the GUI.
Here is the short way to create a dataset. First, get a list of storage providers that are already part of your account. You should have at least one called Gradient Managed.
gradient storageProviders list
+------------------+-----------------+------+------------------------------------------+
| Name             | ID              | Type | Config                                   |
+------------------+-----------------+------+------------------------------------------+
| Gradient Managed | splXXXXXXXXXXXX | s3   | accessKey: XXXXXXXXXXXXXXXXXXXX          |
|                  |                 |      | bucket: XXXXXXXXX                        |
|                  |                 |      | endpoint: XXXXXXXXXXXXXXXXXXXXXXXXXXXXXX |
|                  |                 |      | secretAccessKey: ********                |
+------------------+-----------------+------+------------------------------------------+
Then create a dataset named demo-dataset using the Gradient Managed storage provider ID:
gradient datasets create \
  --name demo-dataset \
  --storageProviderId splXXXXXXXXXXXX
Datasets with other names can be created similarly. The dataset name should match the name referred to in the YAML. Note that Datasets can also be referred to directly by their IDs, but names are usually more convenient unless a specific Dataset version needs to be referenced.
Dataset creation in the GUI
You can also create a Dataset using the GUI. See how to create a dataset and dataset version in the GUI.
Run a workflow
Workflows can be run by triggering them to run by making a change to your linked GitHub repository, or by invoking them directly using the command line.
How to run a workflow in the GUI
Workflows can be triggered to run from Gradient by placing them in the .gradient/workflows directory in your linked repository. This directory should be created if it does not exist.
Within the Workflow YAML, the on: field is used to indicate that this Workflow is to be triggered to run when the given conditions are met. For the general case of any change to the repo triggering the Workflow to run, the YAML lines are
on:
  github:
    branches:
      only: main
Currently, this is the condition set that works, so to prevent a Workflow being triggered, comment the lines out. In future, more general cases such as only changes to specific file types being a trigger will be supported.
How to run a workflow in the CLI
Run the Workflow with the specified Workflow spec file and the workflow-id from the previously created Workflow. (You can also get a list of Workflows by running gradient workflows list.)
gradient workflows run \
    --id <worklow-id> \
    --path ./workflow.yaml
A Workflow can be run multiple times, each with the same or a different Workflow YAML spec. The Workflow spec is recorded as part of the Workflow run so you can distinguish different runs.
The next sections cover the syntax for authoring new Workflow specs, inputs and outputs to Workflow steps, and various Workflow actions.
View the full CLI/SDK Docs for Workflows here.